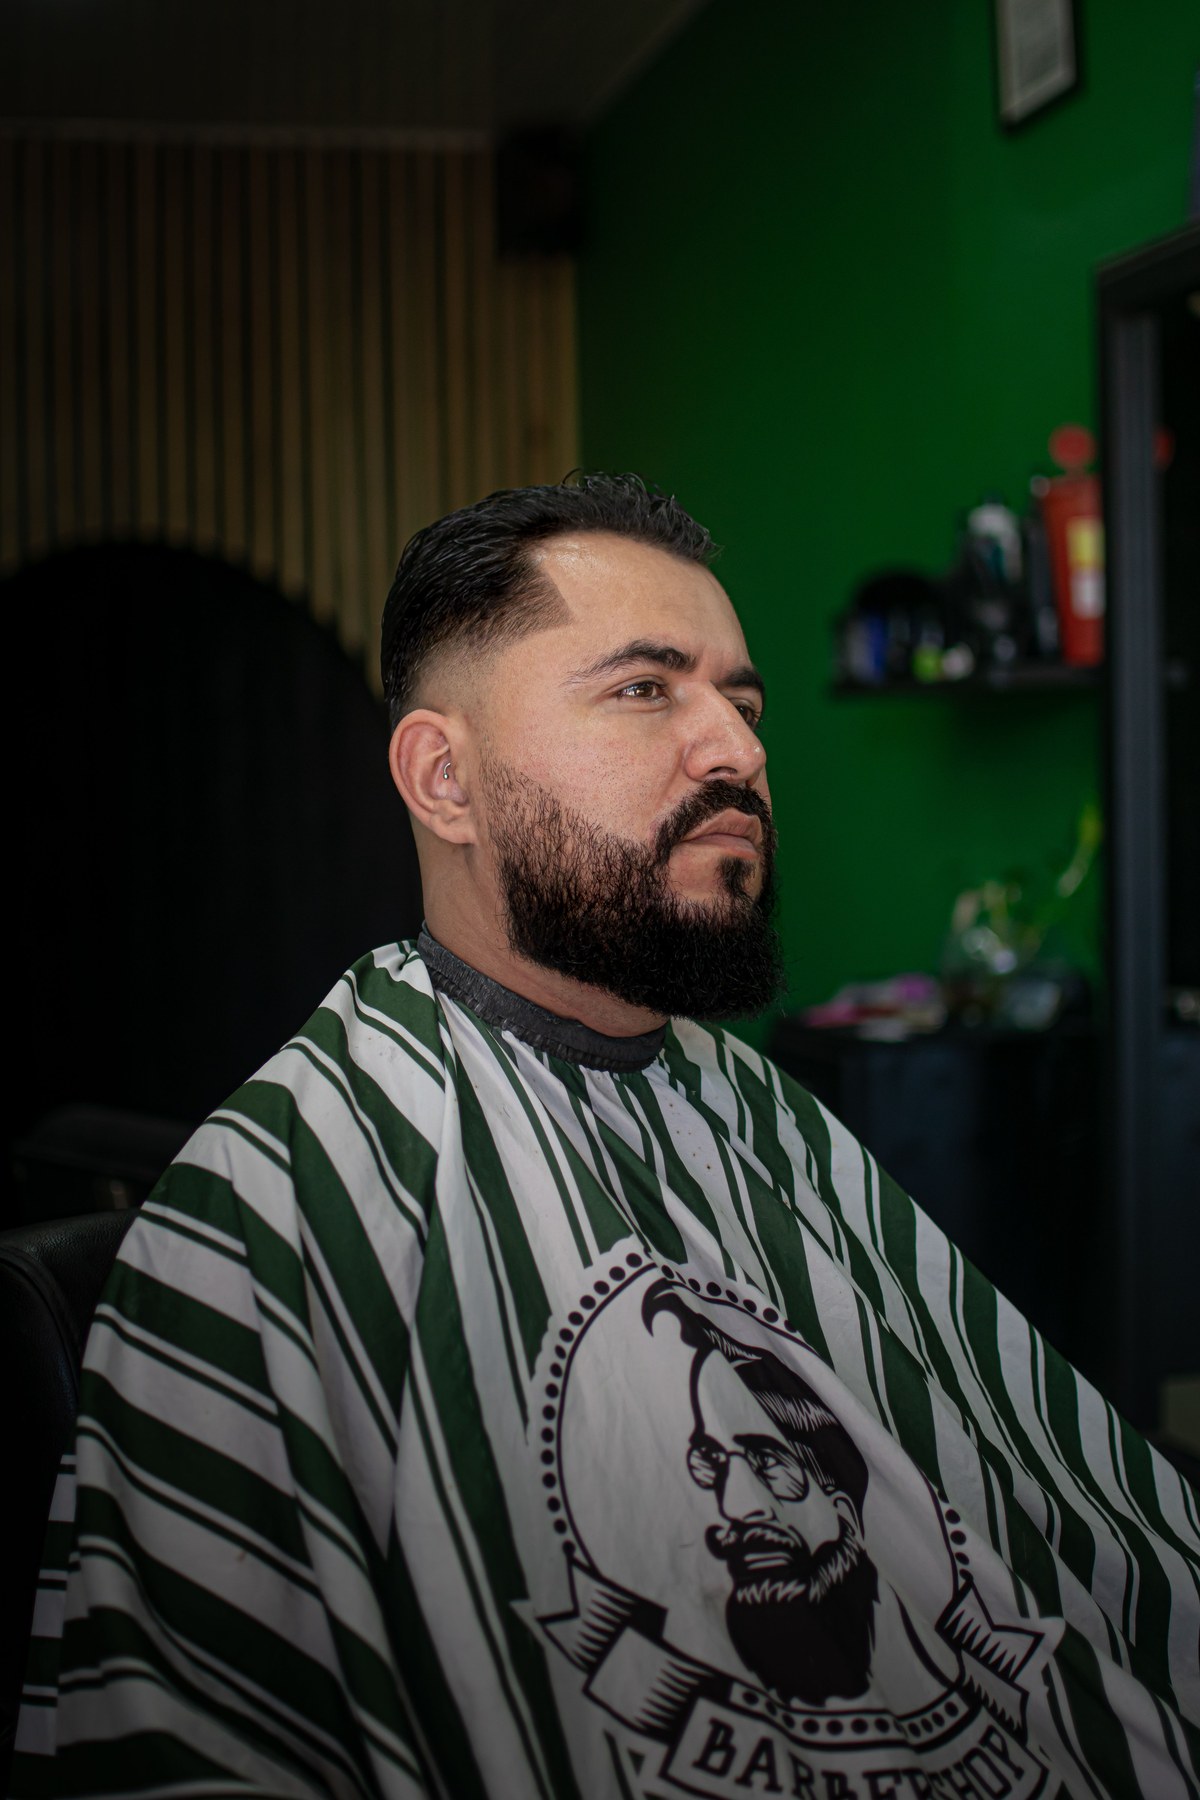
The middle part taper has quietly become the defining haircut of this decade’s young men — the cut you see on campuses, in barbershop chairs, and all over your feed. The formula is simple: a clean, gradual taper on the sides and back, paired with a longer top that splits naturally down the middle.
What makes it work so well is that middle ground. The taper keeps the edges neat and sharp, while the middle part gives the top movement and personality. It suits straight, wavy, and curly hair alike, flatters most face shapes, and grows out gracefully between appointments. Below are eight textured takes on the style — each with a real photo — plus exactly what to tell your barber and how to keep it looking fresh.
What Is a Middle Part Taper?
A middle part taper combines two ideas. The taper is the gradual shortening of hair around the ears, sideburns, and neckline — the hair blends down in length but never disappears to skin the way a fade does. The middle part is exactly what it sounds like: the longer hair on top is parted down the middle, letting it fall naturally to both sides of the face.
The result is cleaner than a grown-out flow but softer than a skin fade. Most versions keep the top around 3–5 inches long, which is enough for the part to sit naturally without constant styling. Ask for a taper (not a fade) if you want that soft, graduated edge.
1. Low Taper Middle Part

Photo: Barber Goodman
This is the cleanest, most wearable version of the cut. The taper sits low — just around the ears and the nape — so the sides keep most of their length while the edges look crisp. It is the safest first step into the middle part taper: office-friendly, school-friendly, and easy to grow out.
Ask your barber for a low taper that stays off the skin, with the top left long enough to part in the middle. A touch of styling cream on damp hair is all it needs. If you want to understand taper heights properly before you sit down, read our low taper fade complete guide — the height logic is the same.
2. Mid Taper Middle Part with Texture

Photo: Barber Goodman / @dddaave
Take the taper a touch higher and you get more contrast — the mid taper creates a visible gradient on the sides that frames the face and adds structure. Paired with a textured top, this is the version that photographs best: the choppy layers catch the light and give the middle part real dimension.
This one suits thicker hair especially well, since the texture stops the top from looking heavy. Our mid taper fade guide breaks down exactly how high a mid taper should go for different head shapes.
3. Wavy Middle Part Flow with a Low Taper
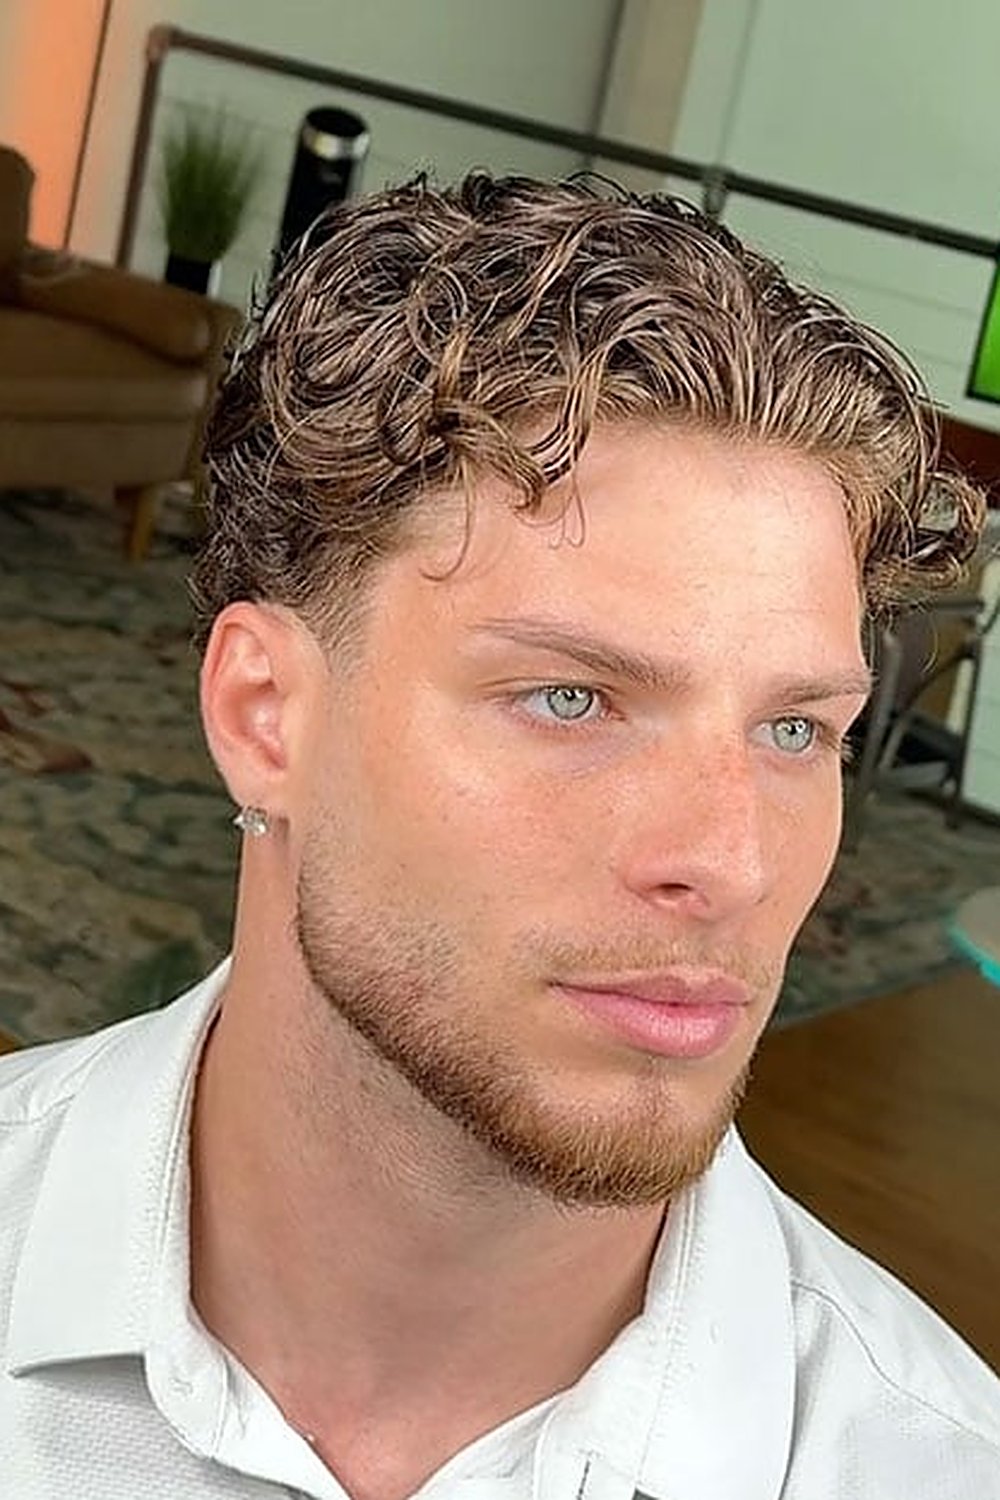
Photo: Barber Goodman / @tristanthebarber
Wavy hair and the middle part were made for each other. Let the top grow a little longer — five inches or so — and the waves fall into a natural flow on both sides while the low taper keeps everything tidy underneath. Sea salt spray on damp hair brings out the wave pattern without any crunch.
The key here is restraint at the sides: too high a taper against a long wavy top looks disconnected. Keep the taper low and let the top do the talking.
4. Wet-Look Slicked Middle Part Taper
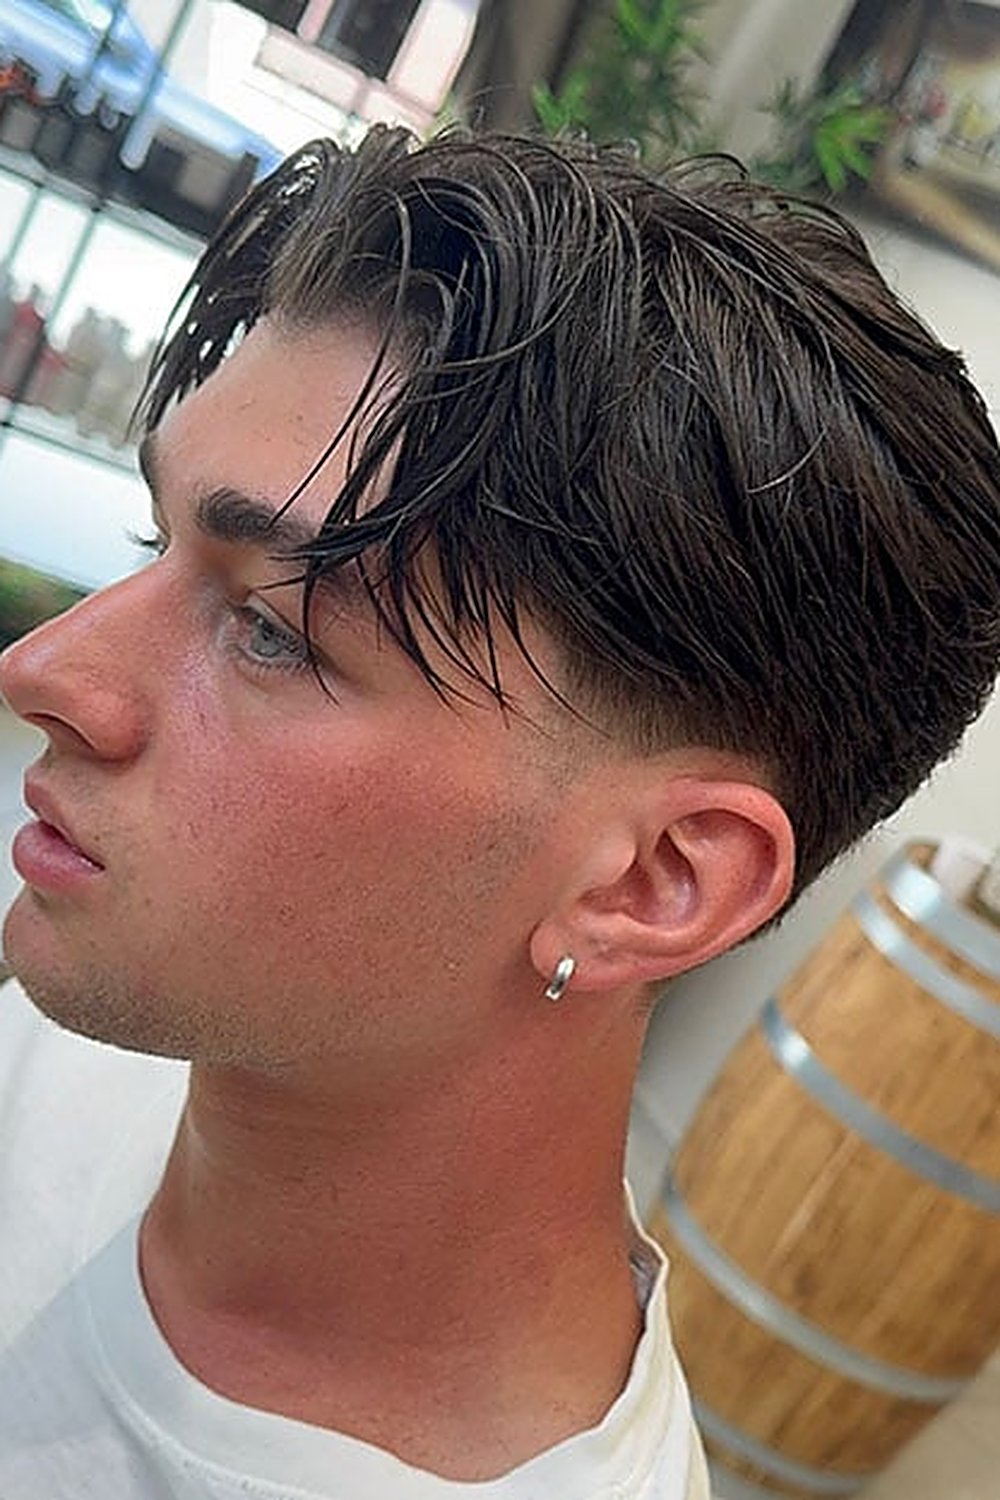
Photo: Barber Goodman / @pompettihair
For evenings and occasions: the middle part slicked back with a wet finish while the taper keeps the edges razor-clean. Comb a high-shine pomade through damp hair, set the middle part, and let it gloss over — the contrast between the polished top and the crisp taper does all the work.
This is the dressiest of the eight and it photographs beautifully. Go easy on the product near the roots, or the part will read greasy instead of glossy.
5. Sleek Straight Middle Part Taper

Photo: Barber Goodman
Straight hair gives the sharpest, most defined middle part — the version that looks almost architectural. The sides drop into a tighter faded edge while the top is smoothed into a clean split. A pea-sized amount of styling cream or a light pomade keeps flyaways down without making it look wet.
6. Middle Part Curtains with a Taper Fade

Photo: Barber Goodman
Curtains are the longer, face-framing cousin of the middle part taper. The front sections grow past the cheekbones and sweep outward, while a soft taper at the sides keeps the silhouette from getting heavy. It is the boldest version here — and the one that gets the most compliments.
Curtains need the most length (four to six inches on top) and a little patience while they grow. If you are weighing this against shorter options, our guide to burst fade styles for young men shows how curtain length pairs with different fades.
7. Messy Textured Middle Part Taper

Photo: Barber Goodman
The undone version: choppy layers, a loose middle part, and texture that looks like you did nothing (you did very little). Ask for point-cut texture through the top and keep the taper tidy underneath so the “messy” reads intentional rather than neglected.
Sea salt spray on damp hair, a quick scrunch, and you are done — this is the lowest-effort style on the list and arguably the most current. It works best on medium-density hair that holds a little natural lift.
8. Textured Curtain with a Drop Taper
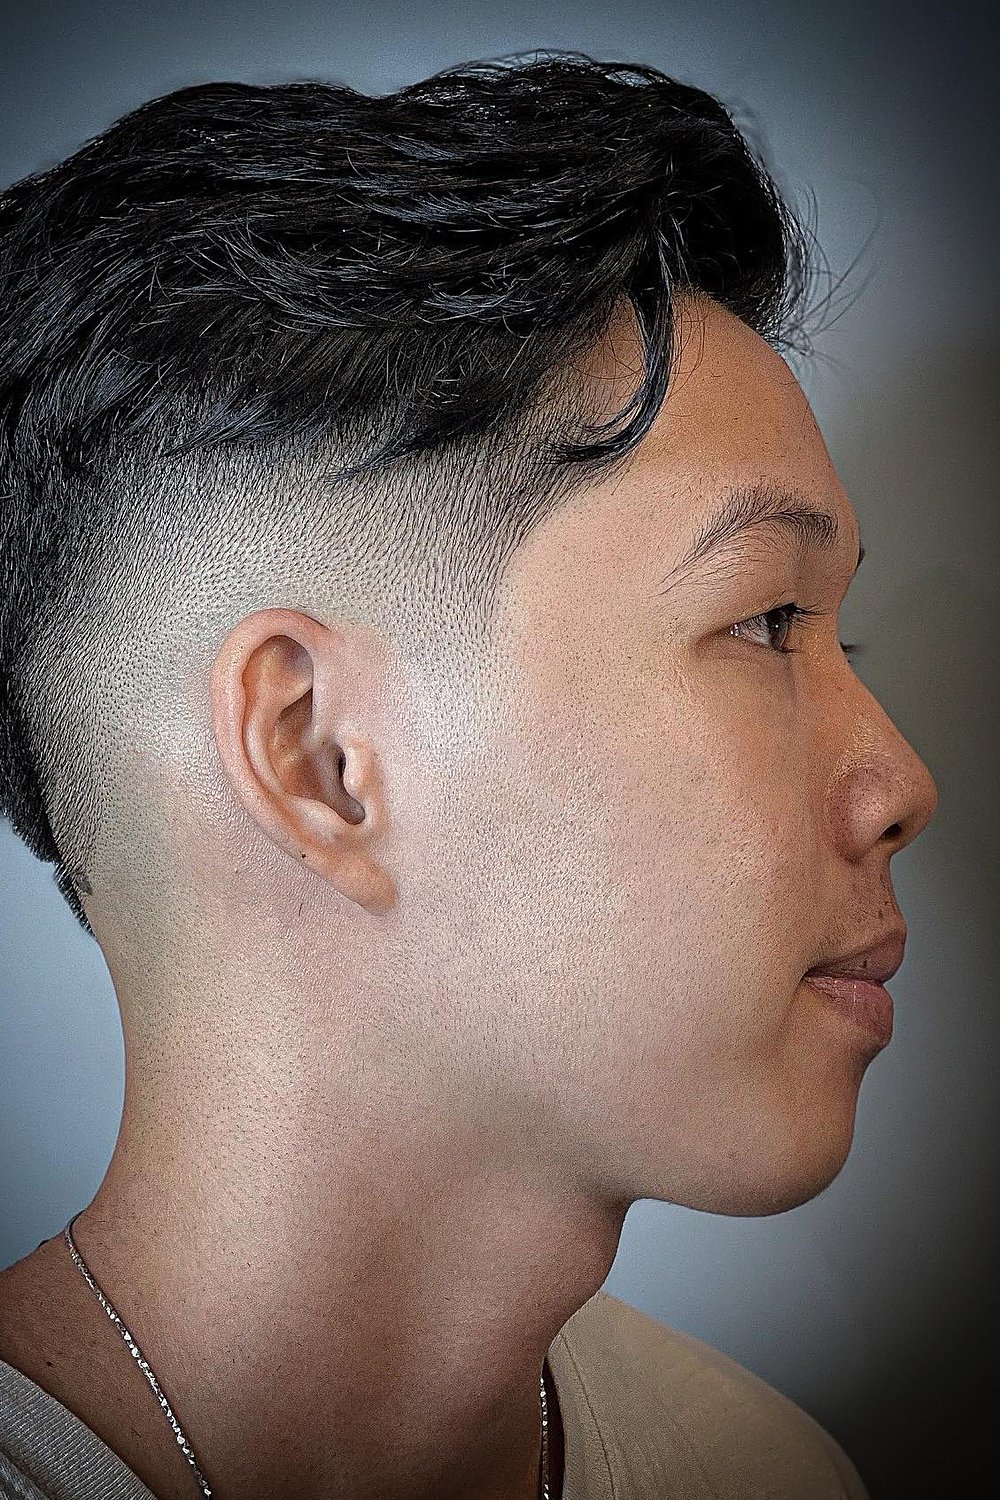
Photo: The Right Hairstyles
A shorter curtain with real attitude: the top stays textured and choppy while a drop taper carves a curved line around the ears — bolder than a straight low taper. It is the edgiest of the eight, and it flatters thicker hair that can hold the texture.
Work a matte clay through dry hair, push the top forward, and let it break apart naturally. Keep the drop line crisp with regular edge-ups — a blurred drop taper loses the whole point of the cut.
If you prefer the top worn forward rather than parted, see our guide to the textured fringe low taper.
What to Tell Your Barber (and How to Keep It Fresh)
Walk in with a photo — ideally one of the styles above — and say this: “A taper on the sides and back — low [or mid], staying off the skin — and keep the top long enough to part in the middle.” Name the taper height, confirm “taper, not skin fade,” and agree on top length (3–5 inches for most versions, longer for curtains or flow).
Upkeep is simple: a trim every 2–3 weeks keeps the taper crisp, and a quick neckline cleanup between appointments extends the cut’s life. Wash 2–3 times a week — daily washing strips the natural oils that help the part sit — and keep a matte clay or styling cream on hand for the top.
FAQs
What is a middle part taper?
It is a men’s haircut with a gradual taper on the sides and back (hair shortens around the ears and neckline without going to skin) and a longer top parted down the middle. It is cleaner than a flow and softer than a skin fade.
Does a middle part taper suit round faces?
Yes — the height on top and the middle part add the illusion of length, which flatters rounder faces. Ask for a slightly higher taper to add structure at the sides.
How long should the top be for a middle part taper?
Around 3–5 inches for most versions. Curtains and flow styles need 4–6 inches.
Can I get a middle part taper with curly hair?
Absolutely — curls are one of the best hair types for it. Keep the top longer so the curls have weight to part down the middle, and use curl cream rather than a comb to set the part.
How often should I trim a middle part taper?
Every 2–3 weeks to keep the taper sharp. The top can go longer between cuts — a neckline cleanup alone can buy you an extra week.
What is the difference between a middle part taper and a middle part fade?
A taper blends gradually and keeps hair at the neckline and around the ears; a fade takes the sides down to skin (or near-skin) for much higher contrast. The taper is subtler and grows out more gracefully.
The Bottom Line
The middle part taper earns its popularity honestly: it is sharp without being severe, modern without being fussy, and it works across nearly every hair type. Pick the version that matches your texture and your mornings — low-maintenance guys should lean toward the low taper or the messy textured cut — bring a photo to your barber, and keep the edges trimmed. The part will do the rest.